- Building a Blog with Elementor: Tips for Beginners
- Why Use Elementor for Your Blog?
- Step 1: Get a Domain and Hosting
- Step 2: Install WordPress and Elementor
- Step 3: Choose a WordPress Theme Compatible with Elementor
- Step 4: Create Your Main Pages
- Step 5: Set Up Your Blog Page
- Step 6: Design Your Homepage with Elementor
- Step 7: Create a Blog Post Layout
- Step 8: Add Blog Content
- Step 9: Customize Your Blog’s Look
- Step 10: Optimize for Search Engines
- Step 11: Make Your Blog Mobile-Friendly
- Step 12: Launch and Promote Your Blog
- Tips for Success with Your Blog
- Conclusion
Building a Blog with Elementor: Tips for Beginners
Creating your own blog may sound overwhelming at first. You might wonder where to start or what tools to use. Luckily, with Elementor, building a professional-looking blog is easier than you think. Elementor is a popular page builder that works with WordPress and helps you design your website visually, without coding. This guide will give you simple tips to build your first blog using Elementor.
Why Use Elementor for Your Blog?
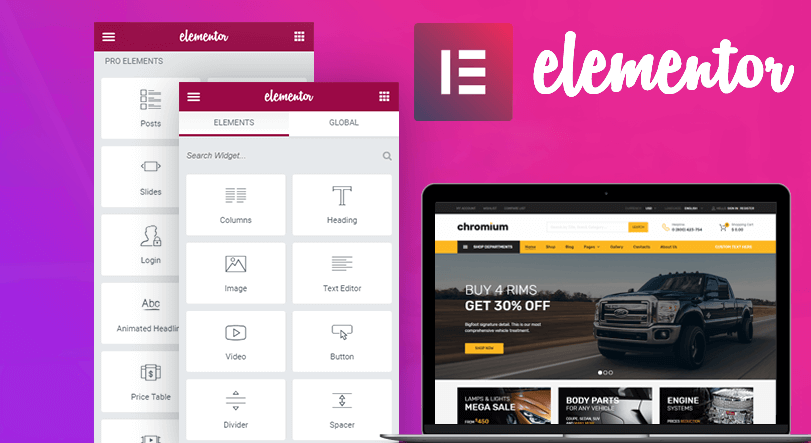
Elementor stands out because it allows you to create your website by dragging and dropping elements. You do not need to know how to code. It has many ready-made templates and blocks which you can customize to fit your style. With Elementor, you can make your blog look unique and professional without hiring a designer.
Step 1: Get a Domain and Hosting
Before you start designing your blog, you need a domain name and web hosting. Your domain is your website’s address like www.yourblog.com. Hosting is where your website lives on the internet. Choose a reliable hosting provider that offers good support and uptime. After purchasing these, you can install WordPress, which is the platform for your blog.
Step 2: Install WordPress and Elementor
Once your hosting is ready, install WordPress. Many hosting providers offer one-click installation for WordPress. After installing WordPress, go to your dashboard and install the Elementor plugin.
- Log into your WordPress admin panel
- Navigate to Plugins and click “Add New”
- Search for “Elementor”
- Click “Install Now” and then “Activate”
You now have Elementor ready to help you design your website.
Step 3: Choose a WordPress Theme Compatible with Elementor
While Elementor works with most themes, it’s better to choose a free or premium theme optimized for Elementor. Astra and Hello Elementor are popular choices because they are fast and flexible. Install your theme by going to Appearance > Themes, then search and install your preferred theme.
Step 4: Create Your Main Pages
Start by creating essential pages such as:
- Home page
- About page
- Blog page (this will list your blog posts)
- Contact page
Go to Pages > Add New, create these pages, and publish them. Later, you will customize each with Elementor.
Step 5: Set Up Your Blog Page
Your blog page will display your posts. To set it up:
- Go to Settings > Reading
- Set “Your homepage displays” to “A static page”
- Choose the page you made for Home as your homepage
- Select your Blog page for posts
This way, your blog page will automatically show new blog posts you publish.
Step 6: Design Your Homepage with Elementor
Now comes the fun part. To customize your homepage:
- Open your homepage in WordPress
- Click on “Edit with Elementor”
- You will see a visual editor where you can drag and drop elements
Start with a header. Use the heading widget to add a catchy title. Add images, text, buttons, or videos to make your homepage inviting. Use Elementor’s templates if you want inspiration; you can insert entire sections and customize them.
Step 7: Create a Blog Post Layout
Your blog post layout is important for readability and visual appeal. To design a blog post template:
- Go to Templates > Theme Builder in Elementor
- Choose “Single Post” and add a new template
- Use the post widget to display titles, images, content, and comments
- Style it to match your brand
Once finished, you can assign it as the default layout for all your posts.
Step 8: Add Blog Content
Start writing your blog posts:
- Go to Posts > Add New
- Write your content, add images, links, and categories
- Publish your posts when ready
Your new posts will automatically appear on your blog page according to the layout you designed.
Step 9: Customize Your Blog’s Look
Make sure your blog looks appealing:
- Use consistent colors and fonts
- Add a sidebar with recent posts or categories
- Include social media links
- Use call-to-action buttons to encourage readers to subscribe or contact you
You can customize these by editing your pages with Elementor.
Step 10: Optimize for Search Engines
SEO (Search Engine Optimization) helps your blog be found on Google. Here are a few tips:
- Use keywords naturally in your posts and titles
- Write descriptive meta titles and descriptions
- Use alt text for images
- Install an SEO plugin like Yoast SEO to improve your rankings
Writing good, useful content is the most important step in SEO.
Related Articles:
Step 11: Make Your Blog Mobile-Friendly
Most visitors will read your blog on their phones. Ensure your design looks good on all devices:
- Use Elementor’s mobile editing tools
- Preview your pages on mobile and tablet modes
- Adjust font sizes and spacing if needed
A mobile-friendly design improves user experience and SEO.
Step 12: Launch and Promote Your Blog
After designing and filling your blog with content, it’s time to go live.
- Double-check your website’s functionality
- Make sure all links work
- Remove any placeholder content
Share your blog on social media, tell friends, or email your contacts. Consistently publish new content to attract visitors.
Tips for Success with Your Blog
- Focus on niche topics you are passionate about
- Post regularly to keep readers engaged
- Use visuals like images and videos to enhance your content
- Interact with your audience through comments or social media
- Keep learning about SEO and website design
Conclusion
Building a blog with Elementor is straightforward and enjoyable. With a little patience, you can create a professional-looking site that showcases your ideas, products, or services. Start small, keep improving, and soon you will have a blog that looks great and attracts visitors. Remember, consistency is key. Keep publishing valuable content and engaging with your readers.
Good luck creating your blog with Elementor!
Image source: Mistersito.com


